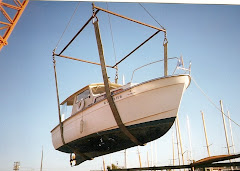
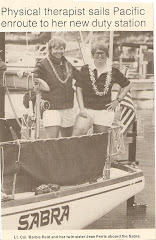
In 2003, my friend Jo had her Albin 25, Lit'l Bit on the hard for the winter here in Tacoma, WA. She lives in Hawaii on the Big Island, so I was going to keep my eye on Lit'l Bit for her and while doing so I decided to design a swim platform. This is a project that I have never done, so I was pushing my creativity envelope to the far reaches of my mind. I traipsed down to Lit'l Bit numerous times in the cold, wet Washington winter to take measurements, tracings and make numerous templates, which I still have and periodically send tracing of the form to other Albin owners.. When spring came, Jo flew over from the Big Island and together we cut the final platform and installed it. Jo no longer owns Lit'l Bit and the new owners have taken her to Alaska.
 |
| MDF Template glued to King Starboard |
 |
| Cut and Still Connected |
 |
| Newly cut and final sanding. That is not snow on the ground but rather shavings |
Meanwhile, Shatoosh was still in California and I was busy cruising the heck out of her. It wasn't until last summer 2011, that I finally got my swim platform installed. I love having it and now my new portaboat Pashmina 2 sits, proudly on it. I have had many compliments on her shape, design and I have to admit that I am totally pleased with my big design project. I have to thank Jo, as she is a master builder with decades of construction experience and to the Salmi Brothers at Warrenton Boatyard in Warrenton, Oregon(near Astoria, Oregon on the Skipanon River) for their superior installation.
Swim Platform for Albin 25
Thoughts to my friends regarding making a Swim Platform
Re: the templates( tracing, cardboard or MDF) and which one you might want depends:
1. If you plan to create your own design and need only the shape of the transom, then a paper tracing should be all you need. My platform is 18 wide which gives one enough room to stand on and walk/sit without being offset by the upper transom rub rail. Remember that the transom is not at 90 degrees but slopes forward as you descend towards the water. Anything less than 18 inches is too narrow. I do not have the exact angle of the transom but maybe someone does.
2. Deciding on materials. I did not want to deal with taking care of more wood which lead me to the starboard. If you were to decide on the starboard then I would want you to use the MDF template as it can be hot glued to the starboard and cut. King Starboard has a non-skid imprint into the surface. See website for info/planning/color selection. www.kingstarboard.com
The brackets I bought from West Marine did have an odd angle in them which is not stated in the catalog and I didn't realize until later. This did not match the angle of the transom so wedges had to be made of plastic and inserted between the bracket and the transom for the platform to be square.
 |
| Wedges placed to square off the brackets and platform |
 |
| Jo and Lit'l Bit You can see how the platform tilts when no wedges are used. |
When installing the brackets it is critical to watch for placement. When you remove the aft cabin liner you will see that the air vents are fiberglassed all the way to the engine compartment which is a beautiful design. When we installed the duplicate platform on Jo’s Albin we could see where a previous platform had been attached and they had drilled into this vent system from the outside and then had to cut a hole into the vent to gain access to the bolt to attach the nut, which meant air was not going down to the engine compartment. Another owner had taken off the original platform, but never re-glassed the hole. It is always amazing what you find in boats with many owners.
 |
| Aft Cabin with Liner Removed Fiberglassed Port Air Vent to Engine Compartment. |
With the shape of my design the 2 smaller brackets fit nicely on the outer side of the vent and the 2 larger brackets fit inward of the vents.
 |
| Placement of brackets with air vent positions |
Then you have to decide on the height placement, too high it looks unsightly and would make it difficult to get onboard if swimming or falling over board, so I placed mine above the lower teak step. I did leave the step SS thru bolts, but took the teak step off the bolts(holders) as I did not want to reglass the holes on the transom. That’s another project. Make sure that you have SS back up plates for the bracket thru bolts. We used SS bolts but one is already rusting. Also, leave room between the platform and the transom for water to drain which is where the wedges/brackets help.
The Finished Product
 |
| Very Nice |
 |
| Good placement with Air vents |
 |
| Beautiful lines on the water |
Swim Platform Materials 2003 prices Makes 2 full transom Swim Platform
See www.kingstarboard.com to see all options for ordering/colors/tools needed to cut materials.
See www.kingstarboard.com to see all options for ordering/colors/tools needed to cut materials.
King Starboard purchased from: Interstate Plastics Attn Byron
w www.interstateplastics.com
6846 So 244th St
Kent Wa 98032
800-742-3444
1 sheet of King Starboard: white in color-- 1in X 54in X 96in. Weighs 180#,
Pre cut at factory into (2) 27in x 66in pieces (these 2 pieces made full platforms for Shatoosh and Lit’l Bit.
With the left over material we then cut:
With the left over material we then cut:
(2) 27in x 30in pieces (these 2 pieces went to John Elmore(Too Tall Tom) for his Skol split transom swim step.) Skol has been bought and now lives in Seattle on Lake Union and is being restored beautifully by his new owner, Corey.
2. Design layout: Concave-Convex Shape
Widest length:64 in
Widest width: 25 ¼ in
Width of platform: 18 in
1. MDF BOARD ½ in X 4ft x 8ft Home Depot cost $14.72
 |
| MDF Template Glued To King Starboard |
2. Stainless Steel Brackets Made by AFI but bought at West Marine
Each platform requires 2 - 7 in brackets and 2- 9 in brackets
4- 60995- 9in x 17 x 1 ½ -- 54.99 ea
4- 60993- 7 in x 14 x 1 ½ -- 42.49 ea
Total: $ 424.24
3. SS bolts/washers/nut/backup plates not included in costs.
4. King Starboard- $458
MDF Board-$15
+Brackets- $424
Total- $898 divided by 2 = Each Platform cost $ 449
I apologize for the errors in numbering and misplaced words/letters. Since I cut and pasted from another file I haven't been able to see them on the editing section of the blog to make corrections. This is one of those times where the blog is in not forgiving of an inserted strange format.
I hope this information is helpful to all you Albin 25 owners who want to make their own swim platform.


